Web Assistant New Volunteer/Placement
First here’s a quick checklist of steps to perform whenever a new volunteer or placement has been added or changed. Further below some screen shots illustrate the steps.
New Volunteer/Supervisor and Placements Procedure
Prepare Volunteer, Supervisors and Jobs Data
- Make sure each volunteer and supervisor has a placement.
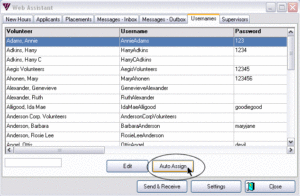
- Assign a user name to any which do not have one: Click Auto Assign on the Usernames tab for volunteers.
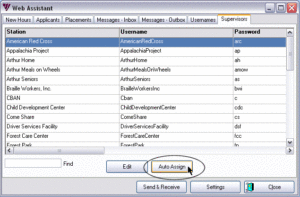
- Click Auto Assign on the Supervisors tab for supervisors.
- Make a filter to limit which jobs will be uploaded.
Send and Receive
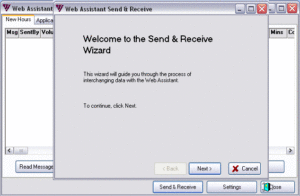
- Click Next on the Welcome screen.
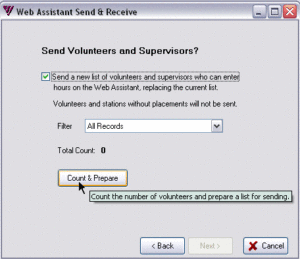
- Check: Send a new list of volunteer and supervisors…. on the Volunteers screen.
- Click: Count & Prepare.
- Next.
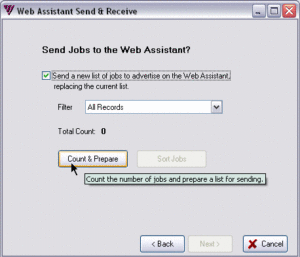
- Check: Send a new list of jobs…. on the Jobs screen.
- If you are using a filter, select it now.
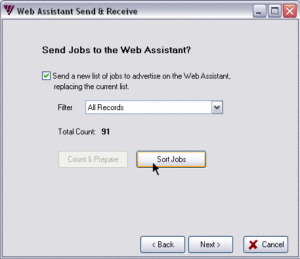
- Click: Count & Prepare.
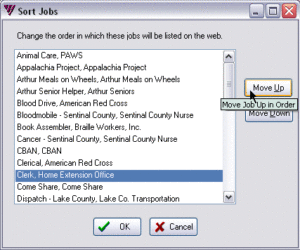
- If you want to change the order of jobs click Sort Jobs.
- Next.
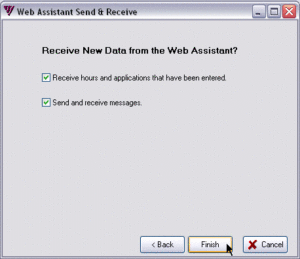
- On the Receive New Data screen leave the Receive hours… and Send and receive messages boxes checked.
- Finish.
- Do not try to cancel during this process. Progress continues even without visible feedback.
Usernames & Passwords
Usernames Tab
Your volunteers log into the Web Assistant with a username and password. You control and change them from the Usernames & Passwords tab. On this tab you’ll see all of your volunteers listed. Initially, all of the usernames and passwords will be blank. You have two ways to assign usernames to volunteers.
- One is to assign them one at a time by clicking on the Edit button. This is useful if you only plan to have a few volunteers enter hours online.
- More commonly, you’ll use the Auto Assign button which will give each volunteer a username based upon their first and last names.
Supervisors
Supervisors Tab
Your station Supervisors can also log into the Web Assistant with a username and password so that they can enter their volunteers’ hours. You control and change their usernames and passwords from the Supervisors tab. On this tab you’ll see all of your supervisors listed. Initially, all of the usernames and passwords will be blank. You have two ways to assign usernames to supervisors, just like with your volunteers. The easiest way is to click the Auto Assign button and let the Reporter do the work.
Send & Receive
Uploading and Downloading Data
You will use the Send & Receive Wizard often to communicate with the Web Assistant server. Just like with an email program, no communication happens with the Web Assistant server until you click on this button. For example, no settings you have changed or messages you have composed will be sent until you click on this button.
Note: Before you perform a Send & Receive, make sure all of your volunteers [and supervisors] have Placements in the Reporter and usernames in the Web Assistant so that they can login and enter hours online.
Click the Send & Receive button.
Click Next.
Send Volunteers Data
The Wizard enables you to send Volunteers’ names including their current passwords, placements, and recent hours. You can send all of your volunteers or you can filter the list if you only want some of your volunteers to be able to enter their hours online.
- The first time, and whenever you add or change volunteer or supervisor data, you check “Send a new list of volunteers and supervisors who can enter hours…”
- Usually you leave the filter at All Records, but you can use a filter to limit who is sent.
- Click Count & Prepare.
- It counts all your volunteers—those without placements will not be sent.
Click Next when it’s ready.
Send Jobs Data
The Wizard next enables you to send a list of Job opportunities to post on the web. Unlike when sending volunteers, you’ll probably want to filter the list of jobs often to include just certain jobs that you want to advertise. Whether you filter the list or not, you can choose what order the jobs will be listed in order to show more important or timely jobs at the top of the list.
Make a Web Jobs Filter
- In Filters click Add Filter, name it Web Jobs or something meaningful. Save.
- On the Job Limits tab with Selected Jobs highlighted, click Edit Limitation.
- Select the jobs to send so that there is a double arrow >> next to each.
- Save. Close filters.
You must send the job data each time you add or change a placement.
Select your Web Jobs filter if you are using one.
To rearrange the order of your jobs list, click the Sort Jobs button.
Send Settings Data and Download Hours and Applications
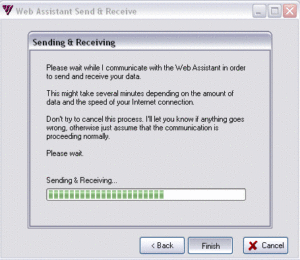
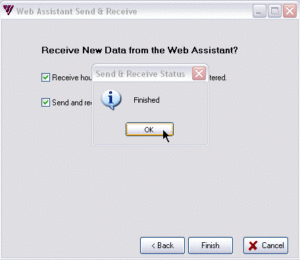
Finally, the Send & Receive Wizard enables you to receive hours and applications as well as send and receive messages. You will normally leave these two checked so that you get the newest data entered by your volunteers. After you click on the Finish button, the Reporter will communicate with the Web Assistant server via the Internet and send and receive your data. Any data received will automatically be shown on the various tabs of the Web Assistant screen.
- Click Finish
- Watch the progress bars
- Ponder the description of the process
Click OK and you are done.

